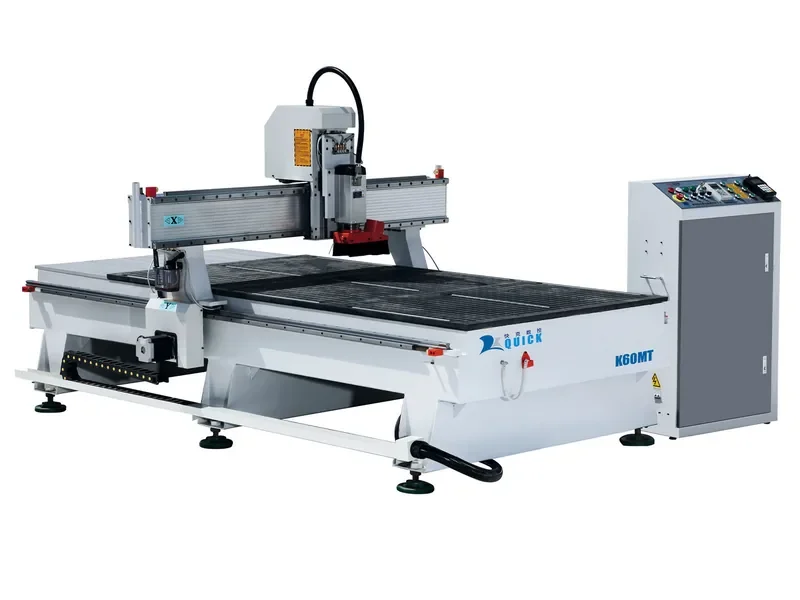
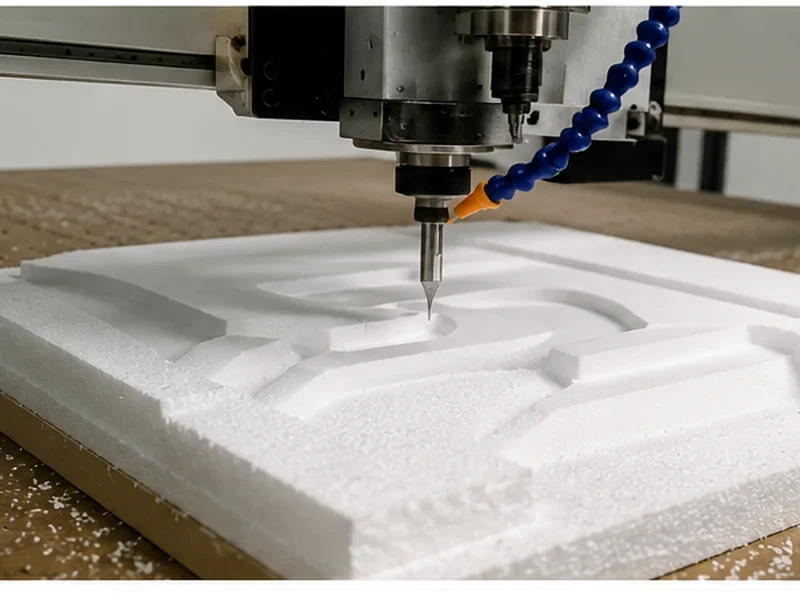
Here is the first thing to decide: if you are cutting rigid or semi-rigid foam and need profiles, pockets, grooves, molds, reliefs or 3D surfaces, a CNC router is a good place to start. If you are only cutting simple shapes through soft flexible foam, look at an oscillating knife before you choose a spindle router.
The word foam covers a lot of very different materials. EPS, XPS, rigid polyurethane tooling foam and flexible EVA do not behave the same way under a rotating cutter. So before talking about spindle power or machine size, start with the actual foam and the part you need to make.
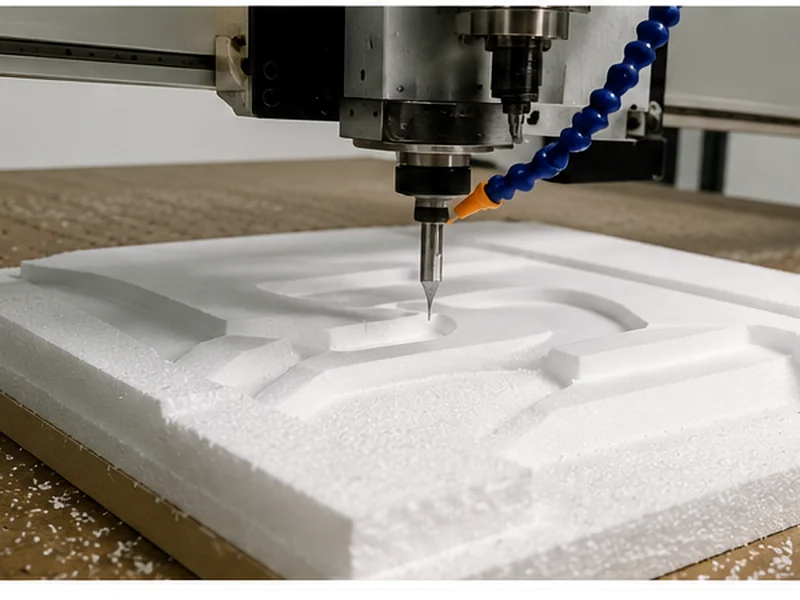
Here’s the Short Version
- Need profiles, pockets or 3D shapes? A CNC router is normally a good fit for rigid and semi-rigid foam.
- Only cutting soft foam all the way through? Check an oscillating knife first. A router is not automatically the better machine.
- Do not start with spindle power. Foam type, block size, Z clearance, tool reach, holding and the actual machining operation matter more.
- Use sharp cutters made for the job. Straight or spiral cutters work well for many profiles and roughing jobs; ball-nose tools are the normal direction for 3D finishing.
- Do not copy somebody else’s RPM and feed numbers. Start with the cutter data and your actual foam, then look at the cut.
- Do not pay for ATC or extra axes unless the job uses them. The drawing should tell you whether those options are worth adding.
First Question: Is a CNC Router Actually the Right Machine?
Before comparing router models, make sure routing is the right process. This can save you from buying a machine that is technically capable of cutting the material but is still the wrong tool for the job.
| Your foam and job | Where we would start | Why | What to look at next |
|---|---|---|---|
| Rigid EPS / XPS profiles, letters and architectural shapes | CNC router | Well suited to profiling, relief work and shaped surfaces | Holding, static debris and cutter reach |
| Rigid PU / tooling foam molds and patterns | CNC router | Works well for roughing, pockets and 3D finishing | Density, finish requirement, toolpath and extraction |
| Large 3D foam molds, sculptures or plugs | Router sized around the geometry | The job may need extra Z space and longer tool access | Block height, deepest feature and holder clearance |
| Soft EVA / EPE / PE foam with simple through-cuts | Look at an oscillating knife first | Soft foam can compress, move or wrap around a rotating cutter | Foam firmness, support and required edge quality |
| EVA pockets, recesses or controlled-depth inserts | A router can make sense | A knife cannot machine controlled-depth pockets in the same way | Holding, deformation and cutter choice |
| Simple 2D EPS / XPS shapes with a constant cross-section | Compare router and hot wire | Hot wire can be efficient for simple shapes; routing is more useful when pockets and 3D detail are involved | Geometry, finish and production volume |
For a wider look at materials, see our CNC router material guide. If your work is mainly flexible sheets, also compare the CNC knife cutter guide before deciding on a router.
What Kind of Foam Are You Cutting?
This sounds like a basic question, but it changes almost everything. Two pieces of foam can have the same thickness and still cut very differently because the density, cell structure and flexibility are different.
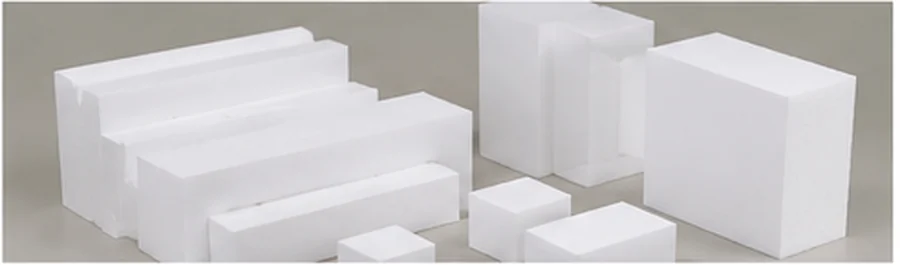
Rigid EPS / XPS
Common for signs, models, architectural shapes and large lightweight forms. The usual questions are how to hold it, how to deal with light static chips and whether the cutter can reach deep enough.
Rigid PU / Tooling Foam
Often used for patterns, molds and prototypes. Here the surface finish matters more, so roughing and finishing normally deserve separate tools and toolpaths.
Flexible EVA / PE-Type Foam
Good for packaging and inserts, but it can squash or move under a rotating cutter. Simple through-cuts often suit a knife better; routed pockets need stronger holding and a real cutting test.
What Kind of Router Bit Makes Sense for Foam?
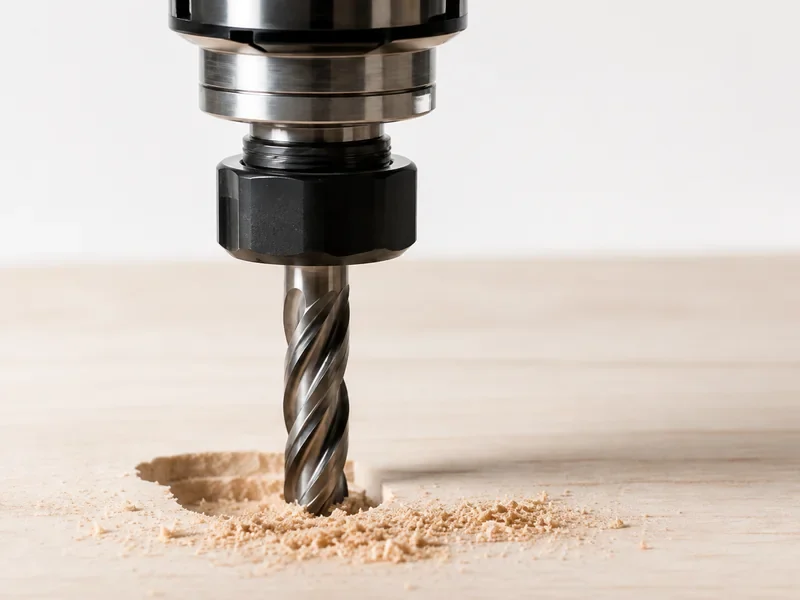
For foam, a sharp cutter matters more than trying to solve everything with spindle speed. The tool needs to remove material cleanly without rubbing, pulling the foam around or cutting the same debris again.
| What you need to cut | Tool to look at | Why | What can go wrong |
|---|---|---|---|
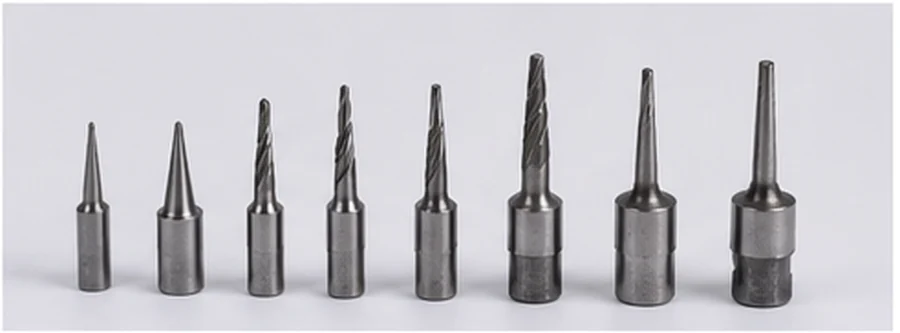
| 2D profiles and pockets | Straight or spiral foam-cutting end mill | Simple, clean material removal | Upcut can lift poorly held foam; downcut can make debris harder to clear |
| Fast roughing in thick rigid foam | Larger-diameter cutter with only the reach you actually need | Removes bulk material faster and reaches deeper areas | Too much tool sticking out reduces rigidity |
| 3D finishing | Ball-nose foam cutter | Better suited to smooth curved surfaces | Large stepover leaves visible scallops |
| Dense plastic-like foam | Single-flute or O-flute style when it suits the actual material | Can help chip clearing and reduce rubbing on some dense foams | Do not copy acrylic settings straight onto foam |
| Very soft flexible foam | Decide on router versus knife first | The material may deform before a clean chip forms | You can spend a lot of time tuning the wrong cutting process |
Dedicated foam cutters are available in straight, spiral and ball-end styles, including longer-reach versions. That is normally a better starting point than using a dull general-purpose woodworking bit. Our CNC router bit guide explains flute direction and cutter reach in more detail.
Feed and RPM for Foam: Don’t Start With a Random Number
If somebody gives you one RPM and feed-rate number for every kind of foam, do not treat it as a production setting. The exact foam, cutter diameter, flute count, cutting depth and tool length all change the result.
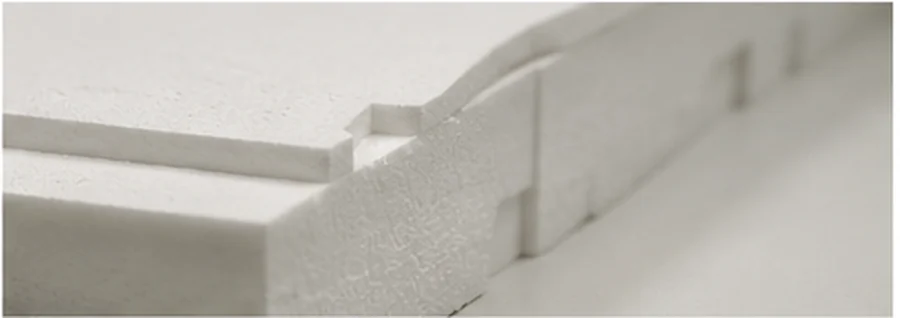
Before changing machine settings, make sure you know the cutter diameter, flute count, cutting length and how far the tool is sticking out. Then make a controlled cut in the actual foam.
The edge normally tells you where to look next:
| What you see | What may be happening | What to check first |
|---|---|---|
| Melted, glazed or smeared surface | The cutter is rubbing and creating too much heat | Sharpness, unnecessary RPM, feed rate and chip clearing |
| Torn edge or chunks breaking away | The tool may be dull, the cut too aggressive or the foam may be moving | Holding first, then cutter condition and cutting engagement |
| Long waste strips wrapping around the cutter | The cutter and toolpath are making debris that does not clear well | Cutter geometry, toolpath and local extraction |
| Foam lifting from the table | The cutter is pulling harder than the holding system can resist | Vacuum leakage, usable holding area, cut direction and tabs |
| Visible scallops on a 3D surface | The finishing stepover is too large for the finish you want | Finishing cutter and stepover before chasing RPM |
| Deep walls look tapered or inconsistent | The long cutter may be flexing, or the foam may be moving | Tool overhang, support and holder clearance |
Change one thing at a time. If you change RPM, feed, cut depth and cutter all together, you will not know what actually fixed the problem. Once the cut looks right, run it again and make sure the result repeats.
For 3D Foam Parts, Don’t Ask One Tool to Do Everything
On molds, patterns, sculptures and other 3D parts, roughing and finishing are different jobs. Trying to make one cutter remove all the material and leave the final surface normally makes both jobs harder.
| Stage | Tool to look at | What you want from it | What matters on the machine |
|---|---|---|---|
| Roughing | Larger straight or spiral cutter where the shape allows | Remove bulk foam quickly while keeping the blank stable | Chip clearing, practical tool reach and stock left for finishing |
| Finishing | Ball-nose or another cutter suited to the surface | Reduce scallops and leave a cleaner final surface | Stepover, tool overhang and holder access |
| Fine detail | Smaller cutter only where the part really needs it | Reach narrow grooves and local details | Rigidity and realistic cycle time |
This is also where ATC starts to make sense. If every program goes from roughing to finishing and then to a smaller detail tool, automatic tool changing can save repeated stops. If one cutter finishes most of the job, there is no reason to add ATC just because it sounds like the higher specification.
Foam Is Light — So Holding It Down Matters More Than You Think
Foam does not take a lot of cutting force, but it is also very light. A large rigid sheet may sit nicely on a vacuum table, then become much harder to hold once you cut it into small parts or remove a lot of material around it.
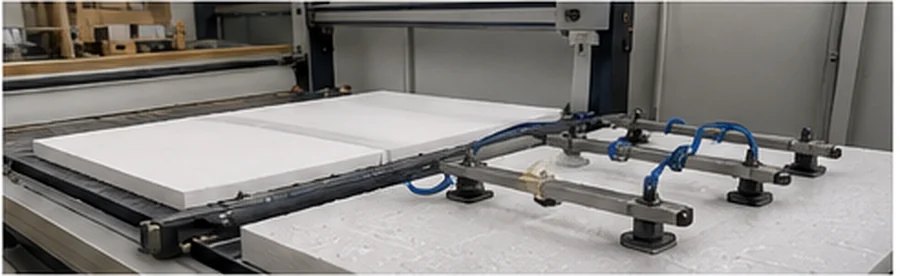
- Vacuum table: good for flat sheets when there is enough contact area and the foam seals well enough.
- T-slots or mechanical fixtures: useful for blocks, odd shapes or material that does not seal well on a spoilboard.
- Tabs or an onion-skin pass: useful when small parts may move before the last pass.
- Sacrificial backing: gives the part more support and protects the machine table during through-cuts.
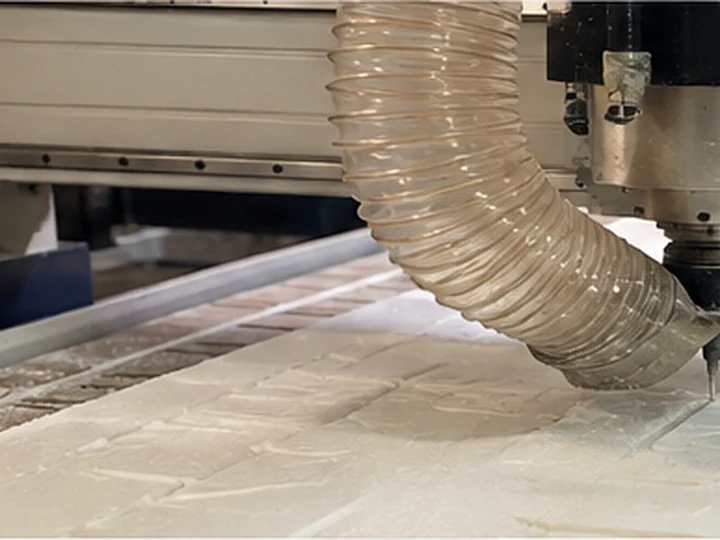
- Local extraction: helps get light foam debris away from the cutter instead of letting it collect around the cutting area.
Foam chips can also cling to the machine because of static. Keep debris away from moving parts, spindle ventilation and electrical areas, and follow the machine documentation, material SDS and your local workplace requirements for extraction and grounding.
Show Us the Foam Part First — Then We Can Choose the CNC Router Setup
For foam work, the drawing tells us far more than a spindle-power number. Start with the largest block, the deepest area you need to machine, how many tools the program uses and which sides of the part the cutter has to reach.
| What the part needs | What that changes | Machine setup to look at |
|---|---|---|
| Large sheet or foam block | X/Y working area and loading space | 3-axis router sized around the real workpiece |
| Tall block or deep pocket | Z clearance, cutter reach and holder clearance | Higher-clearance 3-axis machine when the geometry needs it |
| Roughing + finishing + detail tools in every program | How often the machine has to stop for a tool change | ATC when repeated automatic tool changing actually saves production time |
| Small parts or porous foam | How much useful vacuum holding remains during cutting | Vacuum zoning, fixtures, tabs or mechanical holding around the part |
| Cylindrical or indexed foam parts | Whether the part needs rotary positioning | Rotary-axis setup after diameter, length and holding are clear |
| Deep multi-face mold or areas a straight tool cannot reach | Whether 3-axis access is physically enough | Look at 4-axis or 5-axis only when the CAD actually shows the need |
| Soft packaging foam with simple through-cuts | Whether a router is the right process at all | Compare an oscillating knife before buying a spindle-router solution |
A simple EPS sign may be an easy 3-axis job. A large tooling-foam mold may need much more Z clearance and longer tool access while still being a perfectly normal three-axis part. Complex-looking does not automatically mean five-axis.
You can compare the Quick CNC CNC router range. If the working size, Z height, ATC, rotary setup or extraction interface needs to be different from a standard machine, see our custom CNC solutions.
Not sure whether you need a standard router, more Z height, ATC or extra axes? Send us the foam type, block size and drawing first. We can narrow that down before you start adding options. Send your foam-cutting details.
A Few Foam-Cutting Mistakes That Get Expensive Fast
- Choosing the machine from spindle power. With foam, tool reach, Z clearance, holding and the cutting process are often more important.
- Treating soft EVA like rigid EPS. The same rotating cutter that works well in rigid foam can squash or pull flexible foam.
- Buying the longest cutter you can find. Extra reach also means more overhang and less rigidity.
- Copying a feed-and-speed chart without looking at the cutter. RPM means very little without cutter diameter, flute count, cut depth and the foam itself.
- Only thinking about the full sheet. Vacuum can look excellent at the beginning and still lose small parts near the end of the cut.
- Assuming a 3D part needs five axes. Plenty of large 3D foam parts are still straightforward three-axis jobs.
- Skipping a real sample cut on a new foam. A small test can quickly show whether the cutter, holding and edge quality are going in the right direction.
When Would We Look at an Oscillating Knife Instead?
Imagine you are cutting a soft packaging foam insert and all you need is a clean outline through the sheet. A spindle router can compress the foam, pull narrow areas around or leave an edge that is harder to control.
In that situation, we would look at an oscillating knife first. It separates the material without asking the foam to form a normal machining chip.
The decision changes if the same part also needs pockets, recessed areas, engraved details or a shaped 3D surface. Those operations bring routing back into the conversation.
So the easy way to think about it is: if you only need to separate a soft sheet, look at a knife; if you need to machine depth and shape, look at a router.
What Should a Good Foam Test Cut Tell You?
A test is useful when it answers more than “Can the machine cut it?” What you really want to know is whether the same setup can keep giving you the edge, surface and holding you need.
| What to look at | What you want to see | If it doesn’t look right |
|---|---|---|
| Edge quality | Clean cut without excessive tearing, melting or compression | Look at cutter geometry, sharpness, feed, RPM and cut direction |
| Part movement | The foam stays in place from the first roughing pass to final separation | Improve sealing, fixtures, tabs or cut order |
| Deep-feature access | The cutter reaches the bottom without the holder or spindle getting in the way | Look again at usable Z, cutter length and holder diameter |
| 3D surface finish | Scallops and tool marks stay within the finish you need | Review the finishing tool and stepover |
| Debris control | Foam chips leave the cutting area instead of building up around the tool | Improve local extraction and housekeeping |
| Repeatability | The second, third and later parts look like the first one | Recheck holding, tooling and the cutting process before treating the setup as ready for regular production |
How We Would Work Through Your Foam Job
We normally start with the part, not a machine model. Once we understand the material and what the cutter has to do, the machine choice gets much easier.
- Start with the foam. Tell us the foam type, trade name or density if you have it, and whether it feels rigid or flexible.
- Show us the part. A CAD drawing or 3D model tells us whether you need profiles, pockets, deep areas, 3D finishing or multi-face access.
- Check the real size. Maximum length, width and block height decide the useful working area and Z clearance.
- Look at the tools the program actually needs. If the job keeps changing tools, ATC can help. If it does not, there is no reason to add it.
- Make sure the foam can stay in place. Vacuum, fixtures, tabs and extraction should suit the material and the smallest finished part.
- Then check the cut. The final choice should give you the edge, surface, access and repeatability the actual part needs.
You Can Start With Just These 5 Things
You do not need to prepare a full machine specification before contacting us. For the first discussion, these five things are enough.
EPS, XPS, PU tooling foam, EVA or the material name from your supplier.
Length × width × height is enough to start.
CAD, STEP, DXF, PDF or another clear part drawing.
Profiles, pockets, roughing, 3D finishing, through-cutting or a mix.
Tell us whether this is prototype work, batch production or regular daily production.
If you already know the deepest feature, required surface finish, number of tools per program, workshop utilities or destination, send those too. They help later, but you do not need all of them for the first message.
Questions We Often Hear About CNC Router Foam Cutting
Can a CNC router cut EPS and XPS foam?
Yes. Rigid EPS and XPS work well for profiles, signs, architectural forms, reliefs and many 3D shapes. The bigger questions are normally how you will hold the foam, clear the lightweight debris and reach the deepest part of the job.
What router bit should I use for foam?
For many profiles and roughing jobs, start with a sharp straight or spiral foam cutter. For 3D finishing, a ball-nose cutter is normally the more useful choice. Then choose upcut or downcut direction around chip removal and how well the foam is being held.
What spindle speed and feed rate should I use for foam?
There is no single RPM and feed rate that works for every foam. Start with the cutter manufacturer’s information and your actual foam, then watch the edge, chip formation, heat and part movement. Cutter diameter, flute count, depth of cut and tool reach all change the result.
Is a CNC router or hot wire cutter better for EPS foam?
Use a router when the part needs pockets, grooves, reliefs, internal details or 3D surfaces. Hot wire can make sense for some simple EPS or XPS shapes with a constant cross-section. Choose from the geometry you need, not just the word “EPS.”
Is an oscillating knife better than a router for EVA foam?
For soft flexible EVA that only needs simple through-cuts, an oscillating knife is often the cleaner place to start. A router becomes more useful when you need pockets, recesses or controlled-depth machining.
Do I need an ATC CNC router for foam?
Only if your real program keeps changing cutters. If the same part needs roughing, finishing and detail tools every cycle, ATC can save repeated stops. If one cutter does most of the work, ATC may not add much value.
How do I hold lightweight foam on a CNC router?
Vacuum works well for many flat rigid sheets when there is enough sealing area. Blocks, porous foam and small parts may need fixtures, tabs, sacrificial backing or mechanical holding as well.
What should I send when asking about a foam CNC router?
Start with the foam type or density, maximum sheet or block size, drawing or 3D model, the machining operations you need and your output target. That is enough for the first machine discussion.
Sources and Tooling References
Send Us the Foam Part — We’ll Help You Narrow Down the Machine
Start with the foam type, maximum block size, drawing or 3D model, the cuts you need and your production target. From there, we can work out whether the job makes sense on a standard CNC router, an ATC machine, a higher-clearance setup, a rotary or multi-axis machine, or whether a knife cutter would actually be the better process.
Send Your Foam-Cutting Details
Frannie
Hello, I’m Frannie, a CNC machinery specialist with 15 years of experience in the woodworking CNC industry. I help furniture factories, cabinet makers, woodworking workshops, and production businesses choose CNC machines that match their production needs, factory size, budget, and efficiency goals.
My work focuses on solving real production problems, including replacing outdated equipment, improving machining efficiency, reducing labor costs, and upgrading to smarter CNC solutions. I also support customers with machine installation guidance, operation training, video support, and on-site training when needed, helping them use their machines more confidently and effectively.